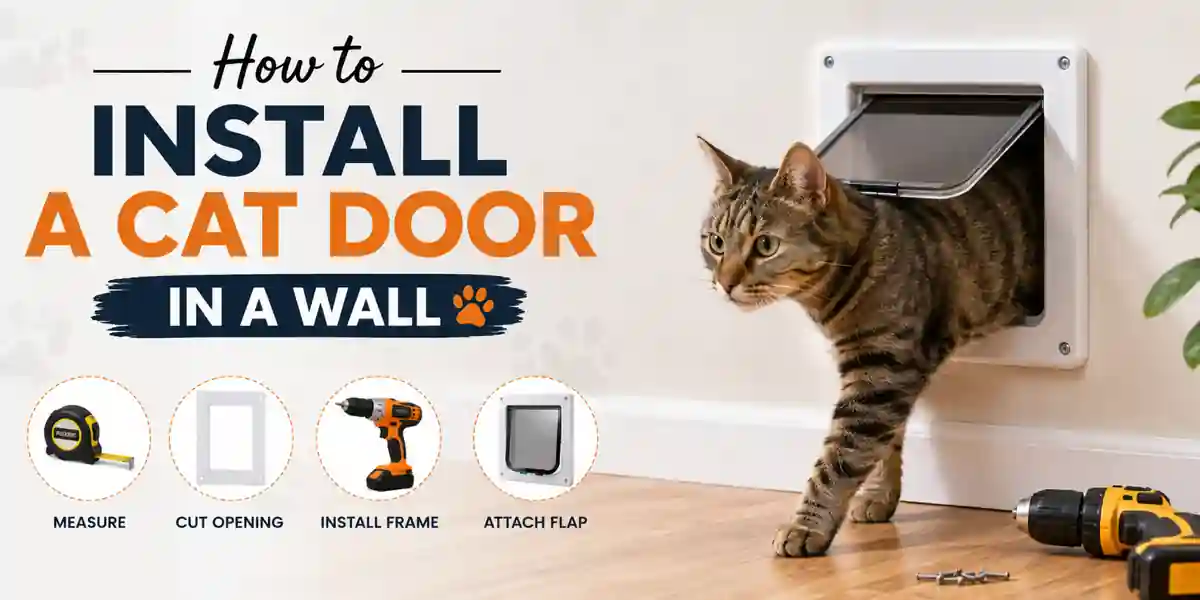
How to Install a Cat Door in a Wall 2026: Step-by-Step Guide
Giving your feline friend more freedom around the house is a win-win. Installing a cat door directly into a wall is a common project for pet owners looking for a more seamless way to grant access between rooms or outdoors. This process, while requiring some basic DIY skills, can significantly improve your cat’s well-being and your daily convenience.
Doing this project right involves careful measuring, precise cutting, and proper sealing. Manufacturer specifications for many cat doors indicate that an opening of roughly 7 x 7 inches is standard for average-sized cats, but always double-check your specific model’s requirements. We’ll walk you through everything you need to know to get this done safely and effectively.
Quick Answer
To install a cat door in a wall, carefully measure and mark the opening using the door’s template. Use a stud finder to avoid structural elements. Cut the hole with a jigsaw, fit the door frames, and secure them with screws.
Finally, seal any gaps to prevent drafts.
Why Visuals Matter: Seeing the Steps to Success
When you’re tackling a project like installing a cat door through a wall, pictures are genuinely worth a thousand words, especially when you’re cutting into your home. Visuals help you understand the spatial requirements, see where to place cuts accurately, and recognize what a properly fitted door looks like. They bridge the gap between just reading instructions and actually doing the job.
Think of it like following a recipe where you can see the final dish. For this project, understanding how the door frame sits flush within the wall, how to align the cutting template, and what a clean, sealed edge should look like makes all the difference.
Key Visual Cues for Wall Installation
When you’re looking at instructions or guides, pay attention to how the cat door template is shown against a wall. You’ll want to see how to center it, especially if you need to work around studs. Look for diagrams showing the cutting lines relative to wall thickness and stud placement.
Pay special attention to images depicting the two-piece frame system. Seeing how the inner and outer frames interlock and are screwed together visually clarifies the assembly process. The final clean look, with minimal gaps and a flush fit, is the goal.
Common Visual Mistakes to Spot
One common mistake people overlook until it’s too late is not visualizing a stud finder’s output. If diagrams show a stud right where the opening needs to be, that’s a clear signal you need to adjust the door’s position. Another visual cue to look for is how the door seal sits against the wall; if it’s gapped or uneven in a picture, that’s a sign of potential draft issues.
Also, be mindful of the scale in any reference photos. What looks like a small gap in a picture might be a significant air leak in reality. Always compare the visual to your actual cat door dimensions and your wall.
The Cat Door: What’s Inside and What It Does
Every cat door kit comes with a few key components designed for a straightforward installation, whether you’re working on an interior or exterior wall. Understanding these parts helps you know what to expect and how to assemble them correctly.
Features and Components You’ll Find
- The Flap: This is the flexible barrier that swings open and shut, allowing your cat to pass through while helping to keep out weather when closed. Most flaps are made of durable, flexible vinyl or rubber.
- Inner and Outer Frames: These are the structural parts that hold the flap mechanism. They typically slide together, sandwiching the wall material to create a secure and finished opening. One side will have mounting holes for screws, and the other will receive them.
- Tunnel or Wall Liner (sometimes included): For thicker walls, especially those with significant insulation, a tunnel piece or liner might be included to create a clean passage between the two frames.
- Mounting Screws: These are provided to fasten the inner and outer frames together.
- Template: A paper or cardboard cutout of the required opening size, which you’ll use to trace your cut line on the wall.
Benefits: What’s In It for You and Your Cat
Giving your cat access through a wall-mounted door offers a lot more than just convenience; it genuinely enhances your pet’s environment. Our research indicates that cats who have controlled access to different areas of the home or to secure outdoor spaces often exhibit lower stress levels and greater contentment. This added freedom can reduce frustration for both you and your pet.
For instance, if you have a dedicated litter box area that your cat needs to access from another part of the house, a wall-mounted door eliminates the need for you to constantly open doors. For cats that enjoy supervised outdoor time, a wall installation provides a dedicated exit that can be quicker and simpler than a standard door. As of 2026, the market offers various types that can be customized to your home’s needs.
Step-by-Step: Installing Your Cat Door in a Wall
Installing a cat door in a wall requires careful measurement and precise cutting. It’s a project that’s very achievable with basic tools and a methodical approach. We’ll break down each step to ensure a successful installation.
1. Planning Your Location & Checking for Obstructions
Before you make any cuts, spend time planning where the cat door will go. Think about your cat’s habits. Do they tend to hang out in a specific room or frequently want to go outside?
This will help determine the best placement.
Marking the Wall
Once you’ve chosen a spot, take your cat door’s template (usually provided in the kit) and hold it against the wall. Use a level to ensure it’s straight, then trace the inner outline of the template with a pencil. This line marks where your opening will be.
Using a Stud Finder
This is critical. Before cutting, use a stud finder to scan the area within your traced outline and along the lines themselves. You must avoid cutting into a wall stud, as this will complicate the installation significantly and potentially weaken your wall.
If a stud is in the way, you’ll need to reposition the template and re-trace. Also, be mindful of electrical wires and plumbing, which a stud finder may also help detect. If you’re unsure, it’s better to err on the side of caution and choose a different location.
2. Making the Cut
With your opening clearly marked and confirmed to be free of obstructions, it’s time to make the cut. Safety first, so put on your safety glasses and gloves.
Drilling Pilot Holes
At each corner of your traced opening, drill a pilot hole. These small holes allow you to easily insert the blade of your cutting tool. Ensure the pilot hole is just inside your traced line, so the actual opening you cut is the correct size for the cat door frame.
Using Your Saw Safely
For most drywall installations, a jigsaw is the best tool for this job. Insert the jigsaw blade into one of your pilot holes and slowly begin cutting along the traced line. Keep the saw’s base plate firmly against the wall for control.
Work your way around the entire opening. If you’re cutting through thicker walls or materials like plaster, you might need a reciprocating saw or a more specialized tool. Ensure the cut-out piece of wall is removed cleanly.
3. Fitting and Securing the Door
After the hole is cut, test the fit of the cat door’s frame. It should slide through the opening snugly.
Testing the Fit
Gently try to insert the outer frame of the cat door into the opening from one side. It should fit without excessive force being needed. If it’s too tight, you might need to carefully shave a bit off the edges of the drywall opening with a utility knife or fine sandpaper.
If it’s too loose, you may need to add small shims when you install the frame later, or consider a different mounting method if the gap is substantial.
Installing Inner and Outer Frames
If your kit has a two-piece design, slide the outer frame through the wall opening from the side you’re not currently working from. Then, align the inner frame on your side of the wall. The two frames should interlock or sit flush against each other.
Using the provided screws, fasten the inner and outer frames together through their pre-drilled holes. Ensure the door is firmly secured and doesn’t wobble.
4. Sealing for Comfort and Efficiency
Once the door is firmly installed, you’ll want to seal any small gaps that might have formed between the door frame and the wall. This step is crucial for preventing drafts and keeping out pests, especially if you’ve installed the door on an exterior wall. It also adds a cleaner, more finished look.
- Apply Sealant: Use a suitable caulk or sealant (like a paintable acrylic latex caulk for interior jobs, or a silicone-based exterior caulk for outer walls) to fill any small voids. Apply a continuous bead around the perimeter where the frame meets the wall.
- Smooth and Clean: Immediately after applying the caulk, use a damp cloth or your finger (if using a caulk designed for tooling) to smooth the bead and wipe away any excess before it dries. A clean seal looks professional and performs better.
Avoiding Cat Door Installation Pitfalls
Even with great instructions, DIY projects can occasionally hit snags. Knowing the common issues helps you avoid them from the start and troubleshoot effectively if they arise. Many of these problems stem from rushing the process or not paying close attention to detail.
Common Mistakes That Lead to Trouble
- Ignoring Studs: The most frequent mistake is cutting through a wall stud. This requires either a more extensive framing job or relocating the entire opening. Always use a stud finder meticulously.
- Incorrect Opening Size: Tracing too large or too small an opening makes fitting the frame difficult. Always use the template provided and mark carefully. Double-check the dimensions against the actual door.
- Not Sealing Properly: Leaving gaps around the frame allows drafts, water (if exterior), and even insects to enter your home. Proper sealing is vital for both comfort and functionality.
- Using the Wrong Tools: Trying to cut through a wall with a butter knife won’t work. Ensure you have the appropriate tools like a jigsaw and a reliable stud finder. Trying to force a cut can lead to mistakes or damage.
- Misjudging Placement: Putting the door too high or too low can make it awkward for your cat to use. Consider your cat’s height and their typical door-using posture.
Troubleshooting: When Things Go Wrong
- Door Too Loose: If the opening is too large, you can try inserting thin shims made of wood or rigid plastic around the inside edge of the opening before screwing the frame in place. Caulk can also help fill minor gaps.
- Cat Won’t Use It: This is often a training issue, not an installation problem. Some cats are hesitant with new things. Try enticing them with treats or toys, or gently guiding them through.
- Drafts Persist: Reapply sealant around the frame. Make sure the flap itself closes properly and isn’t obstructed or warped. Ensure the weather stripping (if present) is intact.
Pet Training: Helping Your Cat Use the New Door
An expertly installed cat door is fantastic, but it’s only useful if your cat actually uses it! Most cats are curious and will eventually figure it out, but some need a little gentle encouragement. Patience is key here, as every cat learns at their own pace.
Start by placing favored treats or a familiar toy near the door on the side you want them to enter from. If they hesitate, you can try gently opening the flap for them while they are near. Some owners find success by standing on the other side and calling their cat with a tempting sound or treat.
Avoid forcing them through, as this can create a negative association. For some, simply leaving the flap propped open for a few days helps them get accustomed to the passage before expecting them to use the self-opening feature.
Expert Tips for a Smooth Installation
When you’re cutting into your home’s structure, a little extra foresight goes a long way. Having the right tools, understanding the materials you’re working with, and taking your time are the core tenets of a successful DIY project.
- Double-Check Measurements: It sounds simple, but measuring twice (or even three times) before you cut is the most crucial piece of advice. Use a reliable tape measure and ensure your marks are clear and accurate.
- Understand Wall Composition: If you’re not dealing with standard drywall, research the material first. Installing a cat door through plaster and lath, concrete, or brick requires different tools and techniques, and might be best left to professionals.
- Consider Insulation: For exterior walls, you’ll be cutting through insulation. Most cat doors come with a basic tunnel piece, but for better energy efficiency, you might need to purchase additional insulation material to fit around the tunnel. Manufacturer specifications typically don’t cover advanced insulation techniques, but it’s a critical performance factor.
- Cleanliness Counts: Keep your work area clean. Dust from cutting drywall can get everywhere. Having a vacuum handy or sealing off the room can help.
Safety First: Essential Precautions
Working with tools and cutting into walls carries inherent risks. Prioritizing safety ensures you complete the project without injury and protect your home’s integrity. Always operate tools according to their manufacturer’s instructions and wear appropriate personal protective equipment.
- Eye Protection: Always wear safety glasses when cutting, drilling, or even screwing. Flying debris is a common hazard.
- Hand Protection: Wear sturdy work gloves to protect your hands from sharp edges and splinters.
- Electrical and Plumbing Awareness: If your stud finder indicates potential wiring or pipes behind the wall, do not proceed with cutting in that area. Consult a professional electrician or plumber if you’re unsure or suspect hazards.
- Tool Familiarity: Ensure you know how to operate your saw, drill, and other tools safely. Read their manuals. Don’t force tools; let them do the work.
Frequently Asked Questions
How long does it take to install a cat door in a wall?
Typically, installing a basic cat door in a standard drywall wall takes between 1 to 3 hours. This timeframe includes planning, cutting, fitting, and sealing, assuming you have all your tools and materials ready and encounter no major structural obstructions.
What is the hardest part of installing a cat door in a wall?
The most challenging part is often the cutting phase, especially if you’re not experienced with power tools. Accurately cutting the hole without hitting studs, pipes, or wires requires precision and the right equipment.
Can I install a cat door in an exterior wall?
Yes, you can install a cat door in an exterior wall, but it requires more attention to sealing and insulation. You’ll need to ensure the door is weather-resistant and that gaps are thoroughly sealed to prevent drafts and water intrusion.
Do cats always use a cat door?
While most cats adapt quickly, some may be hesitant. It often depends on the cat’s personality and requires a short period of positive reinforcement training, such as using treats or toys to encourage them to explore and use the new passageway.
What tools do I need to install a cat door in a wall?
Essential tools include a pencil, measuring tape, level, stud finder, drill with bits, a jigsaw or reciprocating saw, safety glasses, and work gloves. Caulk and a caulking gun are also necessary for sealing.
Cat Door Options: What Fits Your Needs Best?
When you’re choosing a cat door, several factors come into play beyond just how to install it. The “best” option depends on your home’s structure, your cat’s temperament, and your budget. You’ll find simple manual flaps, electronic doors that only open for your cat’s microchip, and even those designed for specific wall thicknesses.
Consider where the door will be installed. An exterior wall needs a sturdy, weather-resistant model, possibly with extra insulation. Interior doors might prioritize a sleeker look and less robust weatherproofing.
Understanding these variations helps you pick the right product before you even start the installation process.
Manual Flap Doors
These are the most common and simplest type. A manual flap door has a flexible barrier that your cat pushes through. They are generally inexpensive and easy to install.
- Pros: Affordable, simple to use, no power required.
- Cons: Doesn’t prevent other animals from entering, can let in drafts if not well-sealed, requires your cat to be trained to push it.
- Best For: Owners on a budget, cats accustomed to using flaps, or for interior doors where security is less of a concern.
Electronic Pet Doors
Electronic doors offer more security and control. They typically use a collar-worn microchip or RFID tag that unlocks the door only for your programmed pet. This prevents strays or wildlife from entering your home.
- Pros: Enhanced security, prevents unwanted visitors, can be programmed for multiple pets.
- Cons: More expensive, requires batteries or a power source, the pet needs a microchip or collar tag.
- Best For: Homes in areas with many outdoor animals, owners who want to restrict access to specific pets, or those seeking a higher level of security.
Draft-Proof and Insulated Doors
These models are designed to minimize air leaks and heat transfer, making them ideal for exterior walls. They often feature magnetic seals, weather stripping, and thicker flap materials or double-pane construction.
- Pros: Excellent for energy efficiency, reduces heating and cooling costs, provides better comfort in extreme weather.
- Cons: Can be more expensive than standard doors, might be bulkier.
- Best For: Homes in climates with significant temperature variation, owners aiming to improve home insulation.
Considering Installation on Exterior vs. Interior Walls
Installing a cat door in an exterior wall versus an interior wall presents different considerations, primarily concerning weather, security, and structural integrity. The process for cutting the hole is similar, but the choice of door and finishing touches vary significantly.
Exterior Wall Installation
When cutting into an exterior wall, you’re dealing with insulation and the need for weather resistance. Manufacturer specifications for exterior cat doors often highlight their ability to withstand rain, wind, and temperature fluctuations. You’ll need to ensure the chosen door has robust sealing and consider adding extra insulation around the tunnel to maintain your home’s energy efficiency.
For example, a door designed for an exterior wall might have a magnetic closure system and a thicker, more durable flap. It’s also crucial to consider what’s behind the wall: studs, wiring, plumbing, and the outer siding material, which might require different cutting tools.
Interior Wall Installation
Installing a cat door between rooms is often simpler. Security and weatherproofing are less of a concern, allowing you to focus on aesthetics and ease of use. You can typically use a more basic model, and the installation might involve less robust sealing.
However, you still need to be mindful of studs and any wiring within the interior wall. The goal here is usually to grant seamless access between areas, like a bedroom and a living space, or a kitchen and a utility room with a litter box.
Common Cat Door Installation Mistakes to Avoid
Even with careful planning, certain mistakes can turn a DIY project into a headache. Recognizing these common pitfalls beforehand can save you time, money, and frustration. Many issues arise from not fully preparing or understanding the nuances of wall construction.
- Ignoring Wall Structure: The single biggest mistake is cutting into a load-bearing stud or structural element without proper support. Always confirm wall composition with a stud finder and consult local building guidelines if unsure, especially for exterior walls.
- Poor Sealing: Failing to properly seal the opening around the cat door frame leads to drafts, pests, and potential water damage on exterior installations. Take the time to caulk thoroughly.
- Incorrect Hole Size: Cutting a hole too large means the door won’t fit snugly, and the frame might sag. A hole too small requires awkward modifications. Stick to the template provided with your specific cat door model.
- Not Training the Cat: Installing a door is only half the battle. If your cat is afraid of it, the installation is functionally incomplete. Consistent, positive training is essential.
- Using Only Interior Cat Doors Outdoors: Interior doors are not built for weather. Using one on an exterior wall will likely lead to damage, drafts, and a short product lifespan.
What Are the Costs Involved in Installing a Cat Door?
The cost of installing a cat door in a wall can vary significantly based on the type of door you choose, the complexity of your wall, and whether you do the work yourself or hire a professional. The cat door itself is often the largest single expense.
- Cat Door Unit: Prices range from around $20 for a basic manual plastic flap to over $200 for a high-end electronic or microchip-enabled door. The features, materials, and brand all influence the cost of the unit itself.
- Tools: If you don’t already own them, you’ll need to factor in the cost of a drill, jigsaw, stud finder, tape measure, level, and safety gear. These can add $50 to $150 or more if purchased new.
- Materials: Sealants, screws, and potentially wood shims or insulation will add a small amount, typically $10-$30.
- Professional Installation: Hiring a handyman or contractor can cost anywhere from $100 to $500 or more, depending on your location and the complexity of the job. This is a good option if you’re not comfortable with DIY or if your wall presents challenges.
Can You Install a Cat Door Through Brick or Concrete?
Installing a cat door through materials like brick or concrete is a significantly more advanced project than through drywall. It requires specialized tools and often professional expertise due to the density and hardness of these materials. Standard jigsaws and drills won’t be effective.
For these types of walls, you’d typically need a hammer drill with masonry bits, possibly a wet saw or angle grinder with a diamond blade for cutting. The process also involves creating a robust frame to support the opening in such solid materials. It is highly recommended that if you are considering this type of installation, you consult with a contractor or masonry specialist to ensure safety and proper execution.