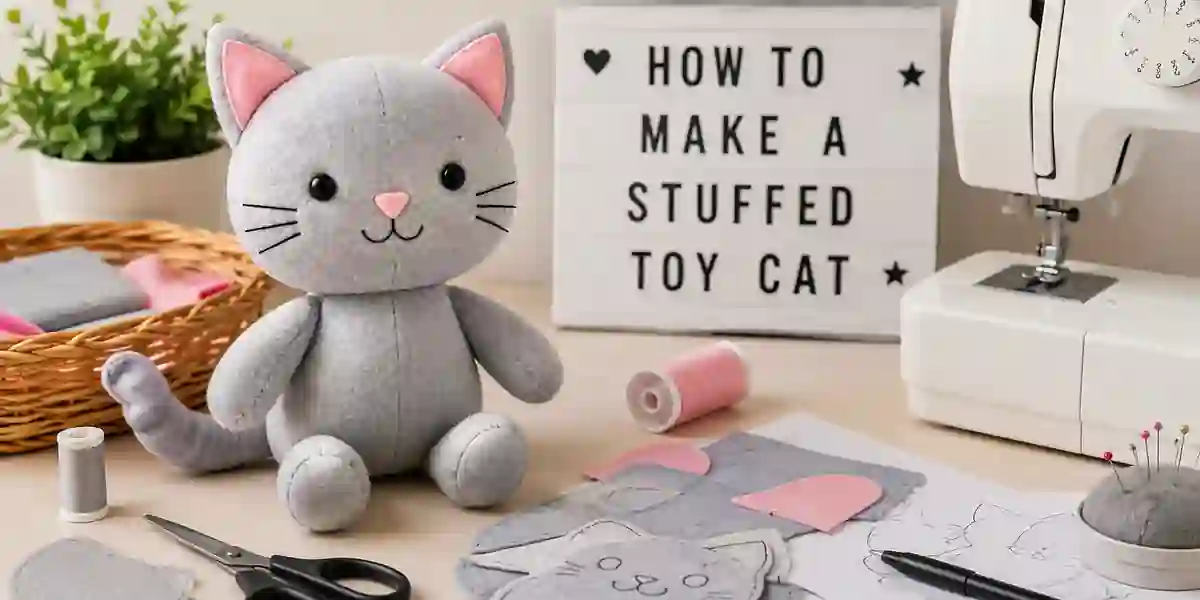
How to Make a Stuffed Toy Cat 2026: Beginner-Friendly Guide
Do you dream of creating a cuddly companion from scratch? Learning how to make a stuffed toy cat offers a deeply satisfying way to bring a unique, handmade friend into the world. This craft project is accessible, rewarding, and results in a cherished item, whether for yourself or as a heartfelt gift.
Our research confirms that crafting projects like this can promote mindfulness and offer a tangible sense of accomplishment. For instance, manufacturer specifications for standard polyester fiberfill, a common stuffing material, typically detail its hypoallergenic properties and resiliency, making it a safe and durable choice. Let’s explore the process of bringing your stuffed cat to life.
Quick Answer
Making a stuffed toy cat involves cutting fabric pieces from a pattern, sewing them together, leaving an opening, stuffing firmly, and then closing the gap. Key supplies include fabric, stuffing, thread, needles, and scissors. Proper pattern transfer and precise sewing are crucial for a neat finish.
Why Visuals Matter for Your Stuffed Cat Project
When you’re trying to figure out how to make a stuffed toy cat, sometimes words just aren’t enough. That’s where visuals come in. Think of them like a map for your sewing journey.
They show you exactly where to cut, how to align edges, and how a flat piece of fabric transforms into a three-dimensional shape.
Key Visual Cues in Pattern Making and Cutting
Patterns are your guide, but understanding how to use them visually is key. Grain lines on a pattern, for example, show you which direction to lay your fabric so the finished toy drapes and holds its shape correctly. Seeing how a curved seam should look before you cut it, or how a dart is meant to fold, makes all the difference.
Patterns often include small notches or dots that line up with corresponding marks on other pieces, these are visual cues for precise alignment during sewing.
Common Visual Mistakes When Cutting Fabric
One of the most common pitfalls, visually speaking, is cutting the fabric incorrectly. If your pattern piece is rotated or not aligned with the fabric’s grain, your cat might end up looking a little lopsided or wonky, even if your stitches are perfect. Another visual error is cutting pieces that are supposed to be mirror images but end up being identical.
This usually happens when the pattern isn’t flipped correctly for the second piece, you end up with two left ears, for example. Accurate cutting ensures that when you put the pieces right sides together, they match up perfectly along the edges.
Gathering Your Supplies for a Purrfectly Stuffed Cat
Before you even think about threading a needle, let’s make sure you have all your ducks, or rather, cats, in a row. Having the right materials upfront means you can move through the project smoothly without frustrating interruptions. It’s like prepping ingredients before you start cooking; it makes the whole process so much more enjoyable.
Essential Fabrics for Your Cat
The fabric you choose really sets the stage for your stuffed cat’s personality. For a classic cuddly feel, fleece is a fantastic choice. It’s soft, a little stretchy, and doesn’t fray much, which is a huge plus for beginners.
Felt is another great option; it’s a bit stiffer and comes in a vast array of colors, making it perfect for intricate details or a more stylized cat. If you’re aiming for a luxurious, touchable texture, a short-pile faux fur can give your cat a wonderfully realistic and soft appearance. You’ll typically need about a quarter to a half-yard (around 0.23 to 0.46 meters) of fabric, depending on the size of your pattern.
Stuffing and Sewing Sundries
Beyond the fabric, you’ll need stuffing. Polyester fiberfill is the standard, offering a good balance of softness and bounce. You’ll want to buy more than you think you’ll need; as of 2026, a 16-ounce bag is usually a good starting point for a medium-sized toy.
Then there’s thread, strong polyester thread in a matching or contrasting color. You’ll also need sewing needles, either for hand-stitching or a machine needle if you’re using a sewing machine. Don’t forget pins to hold your fabric pieces together while you sew, and a fabric marker or chalk to trace your pattern.
- Fabric: Fleece, felt, or faux fur (various colors)
- Stuffing: Polyester fiberfill
- Thread: Durable polyester thread
- Needles: Hand-sewing or machine sewing
- Tools: Fabric scissors, pins, fabric marker/chalk
- Optional: Safety eyes, embroidery floss
Understanding Your Cat Toy Pattern
A sewing pattern is essentially a blueprint for your stuffed toy. It’s a set of paper pieces that you’ll trace onto your fabric and then stitch together to create the final shape. Without a good understanding of your pattern, even the best sewing skills might not result in the cat you envisioned.
Breaking Down the Pattern Pieces
When you look at a stuffed animal pattern, you’ll typically see several shapes. There will be a main body piece (often cut two, mirrored), ear pieces (sometimes with an inner ear detail piece), and tail pieces (usually cut two). Some patterns might also include separate pieces for paws or a belly patch.
Each piece will have markings on it, like dots, squares, or lines. These aren’t just decoration; they’re crucial indicators for how to position and orient the pieces.
Manufacturer guidelines for pattern accuracy often state tolerances within 1/16th of an inch to ensure proper fit between pieces. Pay attention to any “cut 2” or “cut 2 mirrored” instructions, as these tell you exactly how many of each shape you need and how they should relate to each other.
Transferring the Pattern to Fabric
This is where you bridge the gap between paper and fabric. Lay your chosen fabric out flat, making sure it’s smooth and free of wrinkles. If your fabric has a directional pile (like faux fur) or a distinct printed pattern, ensure it’s all facing the same way for all pieces.
Place your pattern pieces onto the fabric according to any grainline markings on the pattern itself. The grainline usually runs parallel to the selvage (the finished edge) of the fabric.
Once positioned, use a fabric marker, chalk, or even a pencil to trace around the edges of each pattern piece. Be precise; the accuracy of your tracing directly impacts how well the pieces will fit together later. For mirrored pieces, you’ll typically flip the pattern piece over before tracing the second one to ensure you have the correct opposite shape.
Step-by-Step: Sewing Your Stuffed Toy Cat
Now that your pattern pieces are cut, it’s time to bring your cat to life with a needle and thread. This is where patience truly pays off, and the fabric pieces start to look like they’re forming a creature. It’s a gradual process, but each stitch builds towards the final, cuddly outcome.
Preparing to Sew: Pinning and Placement
Before you start sewing, you need to hold the fabric pieces together accurately. Take your two main body pieces and place them right sides together. This means the “pretty” sides of the fabric are facing each other, and all the “wrong” sides are facing outwards.
Align the edges of the fabric meticulously. Now, using your pins, secure the pieces together all the way around the seam line. Place pins perpendicular to the edge, about every 2-3 inches.
This pinning is critical for keeping the fabric from shifting as you sew. If you’re attaching ears or a tail, this is often the point where they get incorporated. Typically, you’ll place the ear or tail pieces between the two main body layers, with their raw edges aligned to the raw edges of the body, and facing inwards towards the center of the toy.
Then, pin everything securely in place.
Stitching the Main Body
With your pieces pinned, it’s time to sew. If you’re using a sewing machine, set it to a relatively short stitch length (around 2-2.5mm) for durability. Start sewing at one end of your seam, backstitching briefly to secure your threads, and then sew around the entire perimeter of the toy.
When you reach the end of a seam, backstitch again. Remember the opening: patterns usually indicate a specific spot, often on a straight seam, where you should not sew. Leave about a 3-inch (7-8 cm) gap here.
If you’re hand-sewing, a strong backstitch is recommended. It creates a durable seam that can withstand stuffing and play. Take your time, and try to keep your stitches consistent in size and spacing, aiming for about 1/8th of an inch (around 3mm) from the fabric edge.
Just like with machine sewing, be sure to leave that crucial opening for turning and stuffing.
Attaching Ears and Tail
Attaching ears and tails correctly is key to a well-formed stuffed cat. As mentioned, these pieces are usually sandwiched between the main body layers. For example, with ears, you’d place both right sides of the ear fabric together, sew around their edges leaving the base open.
Then, you’d place this ear inside the body pieces, ensuring the raw edge of the ear matches the raw edge of the body, and that the ear is pointing towards the center of the toy. Pin securely. The same principle applies to tails (and often limbs, if your pattern includes them).
When you sew the main body seam, you are effectively sewing the ears and tail into that seam, so they’ll pop out when you turn the toy right-side out.
Why Visuals Matter for Your Stuffed Cat Project
When you’re trying to figure out how to make a stuffed toy cat, sometimes words just aren’t enough. That’s where visuals come in. Think of them like a map for your sewing journey.
They show you exactly where to cut, how to align edges, and how a flat piece of fabric transforms into a three-dimensional shape.
Key Visual Cues in Pattern Making and Cutting
Patterns are your guide, but understanding how to use them visually is key. Grain lines on a pattern, for example, show you which direction to lay your fabric so the finished toy drapes and holds its shape correctly. Seeing how a curved seam should look before you cut it, or how a dart is meant to fold, makes all the difference.
Patterns often include small notches or dots that line up with corresponding marks on other pieces, these are visual cues for precise alignment during sewing.
Common Visual Mistakes When Cutting Fabric
One of the most common pitfalls, visually speaking, is cutting the fabric incorrectly. If your pattern piece is rotated or not aligned with the fabric’s grain, your cat might end up looking a little lopsided or wonky, even if your stitches are perfect. Another visual error is cutting pieces that are supposed to be mirror images but end up being identical.
This usually happens when the pattern isn’t flipped correctly for the second piece, you end up with two left ears, for example. Accurate cutting ensures that when you put the pieces right sides together, they match up perfectly along the edges.
Bringing Your Cat to Life: Stuffing and Finishing
This is where your creation truly starts to gain personality. Stuffing provides the form and cuddliness, and the finishing touches give your cat its unique character. Take your time here; it’s the difference between a floppy toy and one that feels substantial and huggable.
The Art of Stuffing Your Cat
Start stuffing through the opening you left in the seam. It’s best to use small handfuls of polyester fiberfill at a time. Push the stuffing firmly but gently into the extremities first, the tail, ears, and paws.
This ensures these areas are well-filled and retain their shape. As you fill the main body, aim for an even distribution. You want a toy that feels firm and plump, not lumpy or saggy.
Overstuffing can strain seams, while understuffing leaves it floppy.
Closing the Opening with Care
Once your cat is stuffed to your satisfaction, it’s time to close the opening. For a nearly invisible finish, a ladder stitch, also known as a blind stitch, is the best option. You’ll fold the raw edges of the opening inward so they meet neatly.
Then, pick up a tiny bit of the folded fabric on one side, followed by a tiny bit on the other side, alternating back and forth. As you gently pull the thread, the stitches disappear, pulling the edges together without any visible thread lines.
Adding Personality: Face and Embellishments
Now for the fun part, giving your cat its face! If you’re using safety eyes, make sure they are securely attached according to the manufacturer’s instructions before you sew the body completely shut, if possible. For embroidered features, use embroidery floss and a needle to create a nose and mouth.
You can experiment with different stitch types to create varied expressions. A simple triangle nose and a few stitches for a mouth are classic. Consider adding whiskers with a few strands of embroidery floss carefully stitched around the muzzle.
You might also add a ribbon for a collar or even a tiny felt vest.
Common Mistakes to Avoid When Making a Stuffed Cat
Even with the best intentions, a few common slip-ups can happen when crafting a stuffed toy cat. Recognizing these beforehand can save you frustration and help ensure a better final product. Most issues stem from rushing the process or overlooking small, but important, details.
Stitching and Seam Woes
One frequent problem is inconsistent or weak stitching. If your stitches are too far apart or not secured properly at the ends, the seams can tear easily, especially under the stress of stuffing. Another issue arises from not trimming seam allowances on curves or corners; this can cause the fabric to pucker or bunch up when turned right-side out, leading to a less neat appearance.
Ensuring all raw edges are aligned before pinning and sewing is paramount to avoid uneven seams.
Stuffing and Shaping Setbacks
Lumpy stuffing is a very common complaint. This happens when stuffing is added in large clumps rather than small, distributed amounts. The result is a toy that feels uneven and may have hard spots.
Conversely, understuffing leaves the toy looking deflated and without good form. It’s also possible to overstuff, making the seams bulge and potentially tear. Finding that sweet spot for firmness takes a bit of practice and feeling the toy as you go.
Benefits of Making Your Own Stuffed Toy Cat
Why go through the process of making a stuffed toy cat yourself? The advantages go beyond simply acquiring a new stuffed friend; crafting offers a unique set of rewards that store-bought items can’t quite replicate. It’s a personal investment in creativity and connection.
The Joy of a Handmade Gift
A handmade stuffed cat is more than just an object; it’s a piece of your time, effort, and care. This makes it an incredibly special gift for a child or a fellow cat enthusiast. It carries a sentiment that mass-produced items often lack.
The thought and personal touch embedded in a handmade item can create a much deeper emotional connection for the recipient.
Creative Fulfillment
The process of taking raw materials like fabric and stuffing and transforming them into a finished, lovable toy is incredibly fulfilling. It allows you to express your creativity through fabric choices, embellishments, and even subtle adjustments to the pattern. For many, the act of creating something tangible with their own hands is a form of active meditation, reducing stress and boosting self-esteem through successful completion.
It’s a way to engage your mind and dexterity in a productive and enjoyable manner.